Pages

Showing posts with label Android root tips-micromax. Show all posts

Monday, June 30, 2014

Micromax Canvas HD A116 Rooting+CWM

 Basic Requirement and Downloads

1.Download New version of SP Tool (SP_Flash_Tool_v3.1304.0.119) from here : FT3.13.04.rar or SP Tool 3.13.4
2.Download 4.2.1 stock ROM (SP tool flashable only) from here: 116 4.2 all.rar
3.Extract the “S9201_4.2_MP_F3F8_B1_IN_MMX_09_FLASHER_USER” folder from the 4.2.1 Stock Rom RAR file (actual RAR file name 116 4.2 all.rar)
4.Extract the SP tool folder “SP_Flash_Tool_v3.1304.0.119” from the downloaded FT.3.14.04.rar file
5.For Rooting and Custom Recovery– Download CWM 6.0.3.3 or TWRP 2.5.0.0, SuperSU-v1.25.zip and scatter_emmc.
6.Copy the SuperSU-v1.25.zip to SDCARD.

Installation Process.

1. Run the Flash_tool.exe as Administrator from the SP_Flash_Tool_v3.1304.0.119
2. Select the MT6589_Android_scatter_emmc.txt from the subfolder of S9201_4.2_MP_F3F8_B1_IN_MMX_09_FLASHER_USER
3. Check the Option > USB Mode selected
4. Check the Option > DA Download All > Speed > Force to High Speed selected
5. Click on Download
6. Switch off Your Handset (MMX A116 only) and remove the battery.
7. Connect the battery (don’t try to switch on)
8. Connect the USB cable and let SP Tool to search your handset and download the ROM
**Don't interrupt this process as it can potentially brick your device.
9. In this process the Progress bar will become RED 100%, then INDIGO 100% and finally YELLOW 100%, the entire Process will take around 2-3min only
10. One Green Circle will come after successful installation.

11. Now you can switch on your handset. 
For Rooting

1. Run the Flash_tool.exe as Administrator from the SP_Flash_Tool_v3.1304.0.119
2. Select the MT6589_Android_scatter_emmc.txt which you have downloaded from scatter_emmc
3. Select only the Custom Recovery file download “recovery.img” and let unselect other files.
4. Check the Option > USB Mode selected
5. Check the Option > DA Download All > Speed > Force to High Speed selected
6. Click on Download
7. Switch off Your Handset (MMX A116 only) and remove the battery.
8. Connect the USB cable and let SP Tool to search your handset and download the ROM
**Don't interrupt this process as it can potentially brick your device.
9. In this process the Progress bar will become RED 100%, then INDIGO 100% and finally YELLOW 100%, the entire Process will take around 2-3min only
10. One Green Circle will come after successful installation.
11. Disconnect the USB Cable and Connect the Battery - do not switch on now.
12. Boot in to recovery mode by processing (Volume Up) + (Volume Down) + (Power Buttons)
13. It will show you a screen as Recovery Mode: Volume Up, press the Volume Up.
14. Select install zip from SDCARD and locate and select the SuperSU-v1.25.zip which you copied earlier
15. After installation complete message, reboot your handset.


Read more...

MICROMAX A116 TWEAKS & MODS

Read more...

MICROMAX A116 ROOT + CUSTOM RECOVERY

Read more...

Thursday, June 26, 2014

[Stock ROM] [Stock Recovery] for Micromax A56 and A57

[Stock ROM] [Stock Recovery] for Micromax A56 and A57
 
 These are the stock files obtained from Micromax itself. You can use this under following situations :
-- You want to revert your phone back to factory condition
-- You want to claim warranty at service center
-- You want to unroot it quickly

NOTE : You cannot use CWM Recovery to flash Stock ROM. It will not succeed. Stock ROM can only be flashed using the Stock Recovery. So it is adviced to flash the Stock Recovery first to flash the Stock ROM.

Stock Recovery for Micromax A56/A57

Use fastboot commands to flash stock recovery in a similar way that you have flashed CWM recovery. You can refer the CWM post for flashing steps : http://forums.droidbeans.com/micromax-a56-and-a57-rom-index/(cwm)-cwm-based-recovery-for-micromax-a56-and-a57-ninja/
But make sure that you use this following file instead of CWM recovery while flashing
recovery.img : http://www.mediafire.com/?1h1b151j453bl41

Stock ROM files

Copy the ROM zip file to your SD card. Boot into stock recovery and select update from SD card. Select the ROM file and then it will begin flashing. Reboot phone.

A56 Update 1 : https://www.box.com/s/kjmu8koh4jtop7c6x3nd
A56 Update 2 : Micromax FTP Site update's for A56

A57 Update 1 : http://www.mediafire.com/?b1vvdyxdnz6z66k
A57 Update 2 : http://www.mediafire.com/?0c1r10v8h21w48v
A57 Update 3 : Micromax FTP Site update's for A57
Read more...

How to Root Micromax A56 and A57

How to Root Micromax A56 and A57
 
Micromax A56                                                       Micromax A57
     

Quote
Note :-> this methods is working in both of this device thats why i create this tutorials  for both Devices

ALWAYS CHECK BEFORE TRYING ROOT !

Make sure you’ve more than 75% of battery.
M Not responsible for any damage that may cause.
Rooting voids your phone’s warranty.


REQUIREMENTS

USB Driver Remover – Download
Unlock Root Tool – Download
android.rar - Download


Steps for Rooting Micromax A56/A57

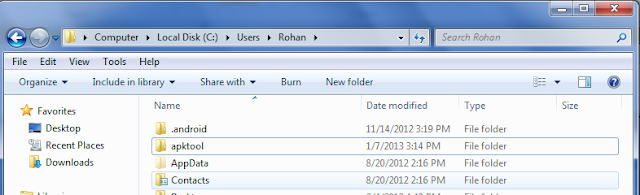
1 Download, extract and place android.rar in C:>Users>YOUR_user_NAME and Reboot!


2 Connect USB with computer and micromax A56/A57, enable "Usb debugging" by going to
Settings>Applications>Development, go there and click on "Usb debugging" to enable it.


3 Download, install and open UnlockRoot


4 Click On Big Green Button


5  It will show how many devices are connected, if you find your device in this list, then click on it's name.


6  It will do the rest of work by its own, do not remove USB or touch in android device.

7 When it is done it will show "Done!" (or something) then you can remove USB and your micromax A56/A57 is rooted now!

8 Done, Enjoy Rooted A56/A57
Read more...

[CWM Recovery][CWM Advanced Edition] PhilZ Touch Recovery [v5] [Formicromax A56 &A57]

[CWM Recovery][CWM Advanced Edition] PhilZ Touch Recovery [v5] [Formicromax A56 &A57]
<< New and First True JB 4.2 migration support: toggle /data/media or /data/media/0 >>
<< New in version 5: True touch GUI and scrolling >>


* * * * * * * * * * * * * * * * * * * * * * * * *
PhilZ Touch 5 Recovery
CWM Advanced Edition 6.0.3.1
* * * * * * * * * * * * * * * * * * * * * * * * *


Quote
>>Special Features in POST 2<<
>>  Downloads in POST 3 <<
>> How to Install in POST 4<<

PhilZ Touch Features: Read POST 2 for instructions to use special functions like aroma and ors support...

Quote
Quote
  • touch interface:
- toggle between 4 touch modes: FULL TOUCH, DOUBLE TAP to validate and SEMI TOUCH (scroll but no touch validation) and NO TOUCH to only use hardware keys
- written from scratch full touch code
- safe full touch : no wrongly validations while scrolling
- when you set full touch mode, it defaults to optimized settings for menu height, scroll sensitivity and touch accuracy (you still can alter them manually later)
- adjust scroll sensitivity in a huge palette
- adjust menu height in a huge palette
- adjust touch accuracy
- 30 color settings for each of the 8 GUI parts + 5 alpha transparency settings
- user custom background png can be selected in addition to 30 solid colors option
- show / hide background icon
- show / hide bottom virtual buttons
- show/hide + set color and transparency for menu line separators to match solid color themes, like Black...
- set number of bottom log rows to show
- Friendly Log View and pause on logs: no more miss logs during zip installs
- auto dim screen after user configurable delay
- auto turn off screen after user configurable delay
- adjust brightness and turn off screen with a gesture action
- show/hide clock and remaining battery %, even during nandroid operations
- clock and battery stats now effectively refresh every 30 seconds and during nandroid operations
- toggle vibrator on/off on touch
- toggle key repeat for volume up/down scrolling when maintained pressed
- key repeat also enabled for virtual buttons
- set time zone + 30mn offset + DST: correct time can now be set for nandroid backup path and clock
- time setting is now applied to all recovery session, including timestamp of created/modified files (v4.92.3+)
- capture recovery screen shots with a gesture action
- one file to save all settings
- backup and restore settings file
- reset to default settings option
- prompt to restore your settings from a backup when they are wiped by a new ROM install
- option to auto restore your settings from a backup without a prompt
- all toggles are applied live, without restart of recovery (except reset of stock CWM background image)
- toggle menu options are automatically right aligned and menu text left aligned based on device display size
- configurable gesture actions: double tap, slide right/left, long press/lift, long press/move, can be associated with any of: show log, change brightness, blank screen, capture screen shot, launch Aroma File Manager
Quote
Note: after scroll, first touch will select only. After one sec of scrolling or on second touch, it will validate immeadiately. This is by design and not a bug. It is there to limit erroneous validation while scrolling
Read more about it here:Validation Lock after scrolling

Quote
  • First to introduce true JB 4.2 migration: toggle between /data/media and /data/media/0
  • browse phone with root access using full GUI in Aroma File Manager
  • terminal access from recovery with root access through Aroma File Manager
  • Multi Zip Install menu: check multiple zip files to install in a row
  • Custom Install Zip Mode: set a default folder to start with + browse backward up to the root
  • exFAT + ext4] support in recovery for external sd
  • TWRP backup and restore support, include full md5 sum support (single and multivolume, compressed and non compressed formats)
  • Advanced statistics during backup operations shown in color: total backup size, backup size progress, backup time, compression ratio...
  • support .android_secure backup/restore from external storage and exfat partitions
  • optional reboot after custom backups/restores
  • sd-ext support (ext4)
  • nandroid backups support /preload in backup and restore jobs (custom and stock modes)
  • nandroid backups support /misc  in backup and restore jobs (custom mode)
  • set special nandroid settings: time zone, toggle md5 check for lightning fast backup and restore, toggle /preload backup and restore, enable nandroid compression using pigz (multi-cpu gzip compression) and choose ors backup target volume
  • you can cancel any nandroid operation with back button
  • create custom_rom.zipfrom current ROM or from a pre-existing nandroid backup (based on boot, /system and optionally /preload)
  • nandroid backup path now will be named with current ROM id from build.prop (ro.modversion, then ro.romversion, then ro.build.display.id)
  • custom backup and restore job list: backup and restore freely any partition combo (include modem and efs)
  • backup/restore EFS in both tar + img formats, now with time incremented copies for both tar and .img
  • support flash modem.bin image files in addition to custom modem.img files, now support for multiple *.bin versions under dedicated folder
  • during custom restore, you can see the contents of the folder you want to restore from
  • delete custom or TWRP backups from recovery menu
  • full wipe before flashing new ROM: wipe user data + format /system and /preload. SD card content is not affected
  • full support for openrecovery script specifications include all backup and restore options
  • run openrecovery scripts in 2 modes: on start goomanager boot scripts + one touch menu to either directly open a default path or freely browse for scripts
  • define ors backup target volume from within Nandroid Settings menu
  • ors restore path supports stock clockworkmod path or TWRP path
  • poweroff, reboot to recovery and reboot to download/bootloader mode options
  • dual USB mount in recovery support and mount external sd over usb for /data/media devices
  • adb root in recovery: just wait about a minute to activate
  • detailed build info in About menu

Video Teaser:
new update soon...


Quote
Main menu and PhilZ Setting

Quote
GUI Preferences: all is applied live (no reboot). Up to 14 menu height settings, scroll sensitivity, touch accuracy...
Quote
27 color settings + 5 alpha transparency levels for every GUI element
Quote
Change background image with a custom png (of your device resolution), a solid color (27 presets) or revert to original cwm image

Quote
User configurable touch gestures (feel free to request for new actions)
Setup your time-zone + 30mn offset, super wipe option to install a new ROM

Quote
Backup and Restore any partition in a complete freedom, include modem (.img + .bin) and efs (.img + .tar)
Custom backups can also be restored by original CWM Advanced Restore Menu
TWRP Backup and Restore Support + md5 + single/multivolume format
Support multi-cpu compression, md5 check toggle and custom .android_secure path
Choose ors backup volume target

Quote
Flash multiple zip files in a raw
Aroma File Manager + Terminal Emulator: launch with a gesture action (double tap is default)


Quote
Full Wipe to Install a new ROM (sdcard is preserved)
Free Browse Mode to install zip files: select a default folder to start with and browse up to the root


Enjoy, and do not hesitate to post feedbacks and comments.....


Credits...

1.Panneer Selvam(Me Porter)

2.Dhinesh Kumar(Tester)(Helper)

3.Dinesh Palanisamy(Tester) (My Friend)

4.Rushi Pawar(Tester)

5.Sasa Kovacic(Tester)

Press Thank U Button If you Like My Work...
Read more...